Customizing the Editor
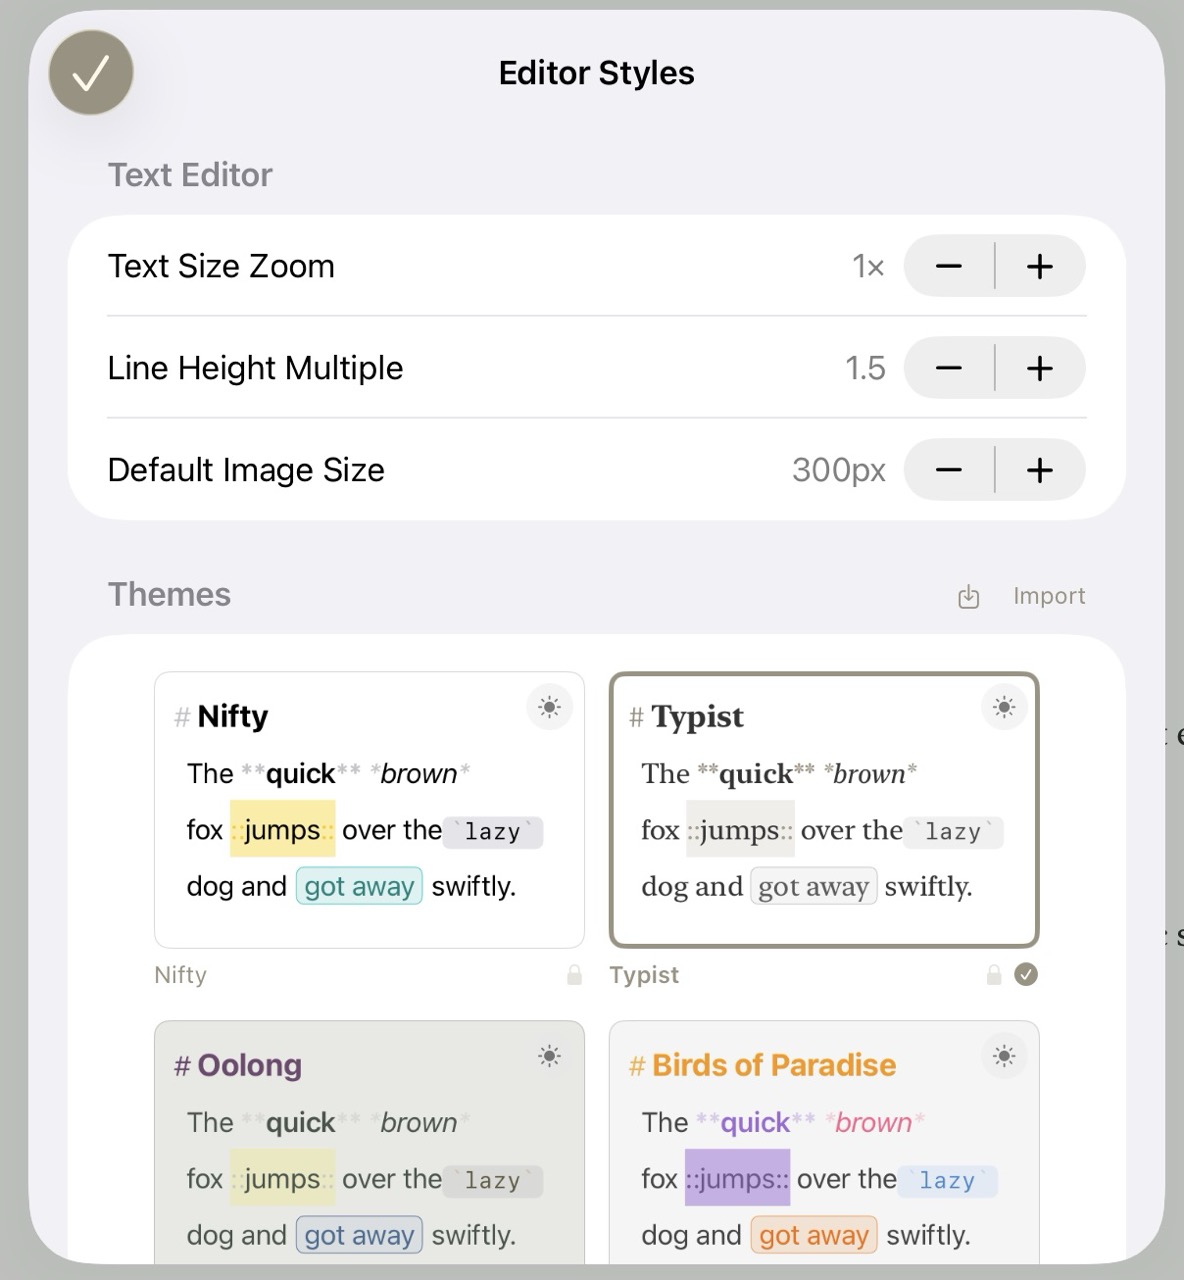
The Editor Style Menu on iPadOS
Atlas lets you tailor the writing environment to your preferences, separate from the publishing process. All editor customization is found in Settings > Editor Styles or can be accessed via the More menu in the iOS editor.
Info
Editor Style controls how your document looks while you're writing. Export Style controls how your document looks when it's rendered for HTML, ePub, or PDF. The two are independent — swap either one without affecting the other. See Custom Export Styles for the export-side equivalent.
Themes
Seven built-in themes are included: Nifty, Typist, Oolong, Birds of Paradise, Solarized, Natural, and Monochrome. A live preview grid shows how each theme looks, and can be toggled between light and dark color scheme previews.
Select any theme to apply it immediately. Themes include styling for all markdown elements, including objects like equations and annotations. You can also duplicate a built-in theme to create an editable copy, or create a fully custom theme with the Theme Editor. See The Theme Editor for a deep dive on custom themes.
Text Size Zoom
Adjust the base text size using the zoom stepper, scaling all text in the editor from 0.5x to 2.0x.
You can also zoom from the keyboard while writing. The Editor menu's Text Zoom submenu offers Zoom Text In (Cmd++), Zoom Text Out (Cmd+-), and Reset Text Zoom, which returns to the default 1.0x. These nudge the size in finer steps than the stepper's arrows, and because it's the same setting, your zoom level carries across devices with iCloud. On iPad, the shortcuts work with a hardware keyboard.
Line Height
The line height multiplier controls the spacing between lines of text. It ranges from 1.0 to 2.0 in steps of 0.25, with a default of 1.5.
Custom Fonts
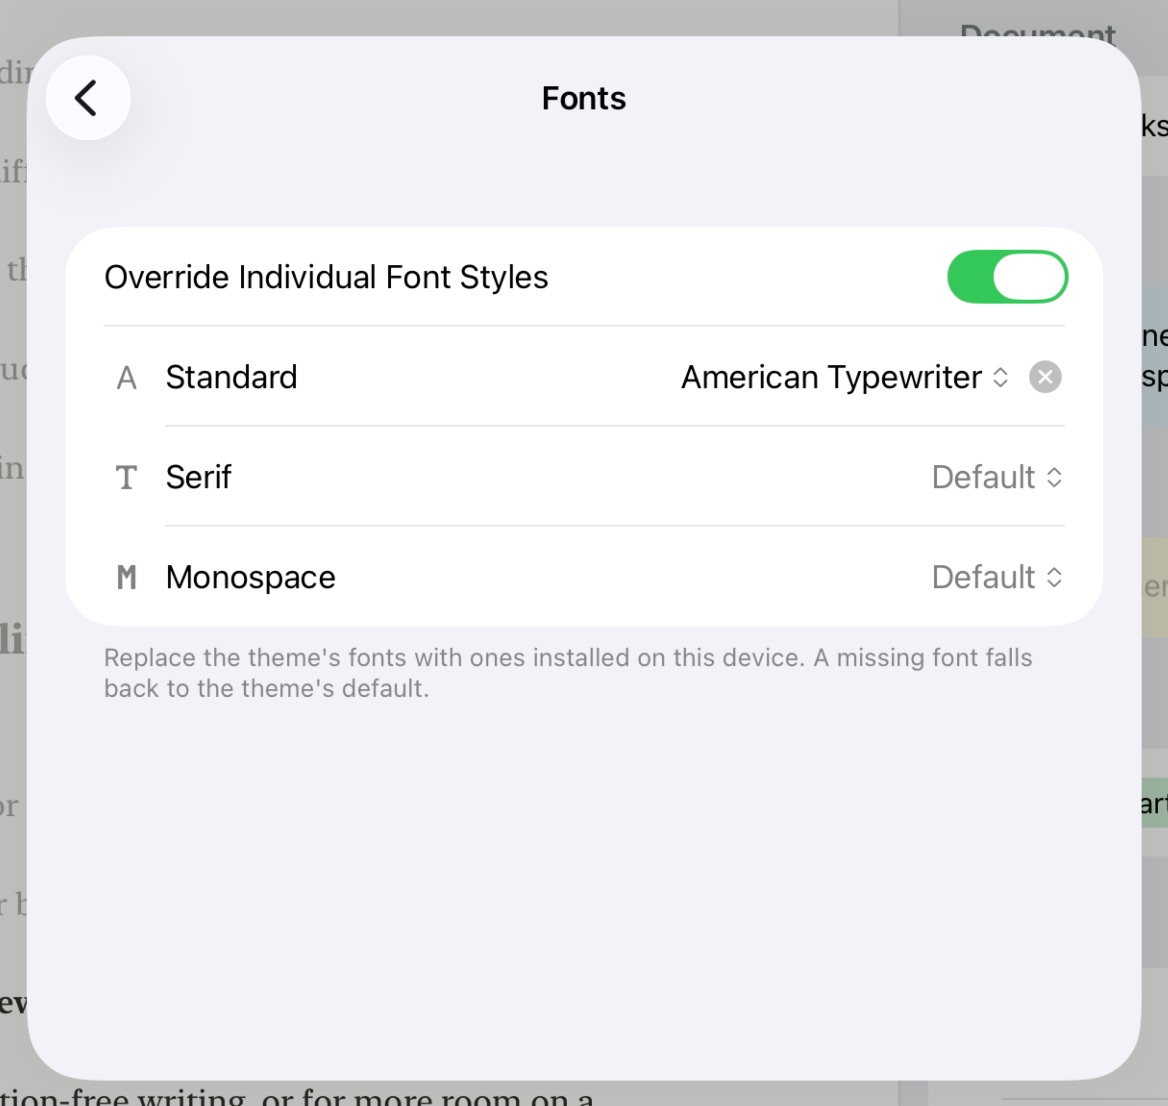
Customizing Fonts on iPadOS
Each theme defines three fonts — a Standard, a Serif, and a Monospace — and every markdown element draws from one of them. Custom fonts let you override those with any font installed on your device, individually or all at once, without editing the theme itself. On iPhone and iPad, open Settings > Editor Styles and tap Fonts in the Text Editor section. On Mac, open Settings > Editor Styles and select the Fonts tab.
Override Individual Font Styles is on by default, giving you a separate picker for the Standard, Serif, and Monospace roles. Choose a font family for a role and the editor updates immediately. Turn the toggle off to collapse all three into a single Font picker when you'd rather use one typeface everywhere.
Any role left as Default keeps the system's own font. To undo an override, use the clear (×) button next to the role.
Info
Custom fonts change how text looks while you're writing. They don't affect exported documents — export appearance is controlled separately by Custom Export Styles.
A font override applies on top of your active theme and is stored on the device you set it on so the font itself doesn't sync across devices. If a chosen font isn't installed on another device, Atlas falls back to the theme's default there.
Default Image Size
Set the default maximum display size for block-level images inserted into your documents. The range is 100px to 800px in steps of 50, with a default of 300px. Individual images can still be resized in the editor — see Images and Sketches for details.
Focus Mode
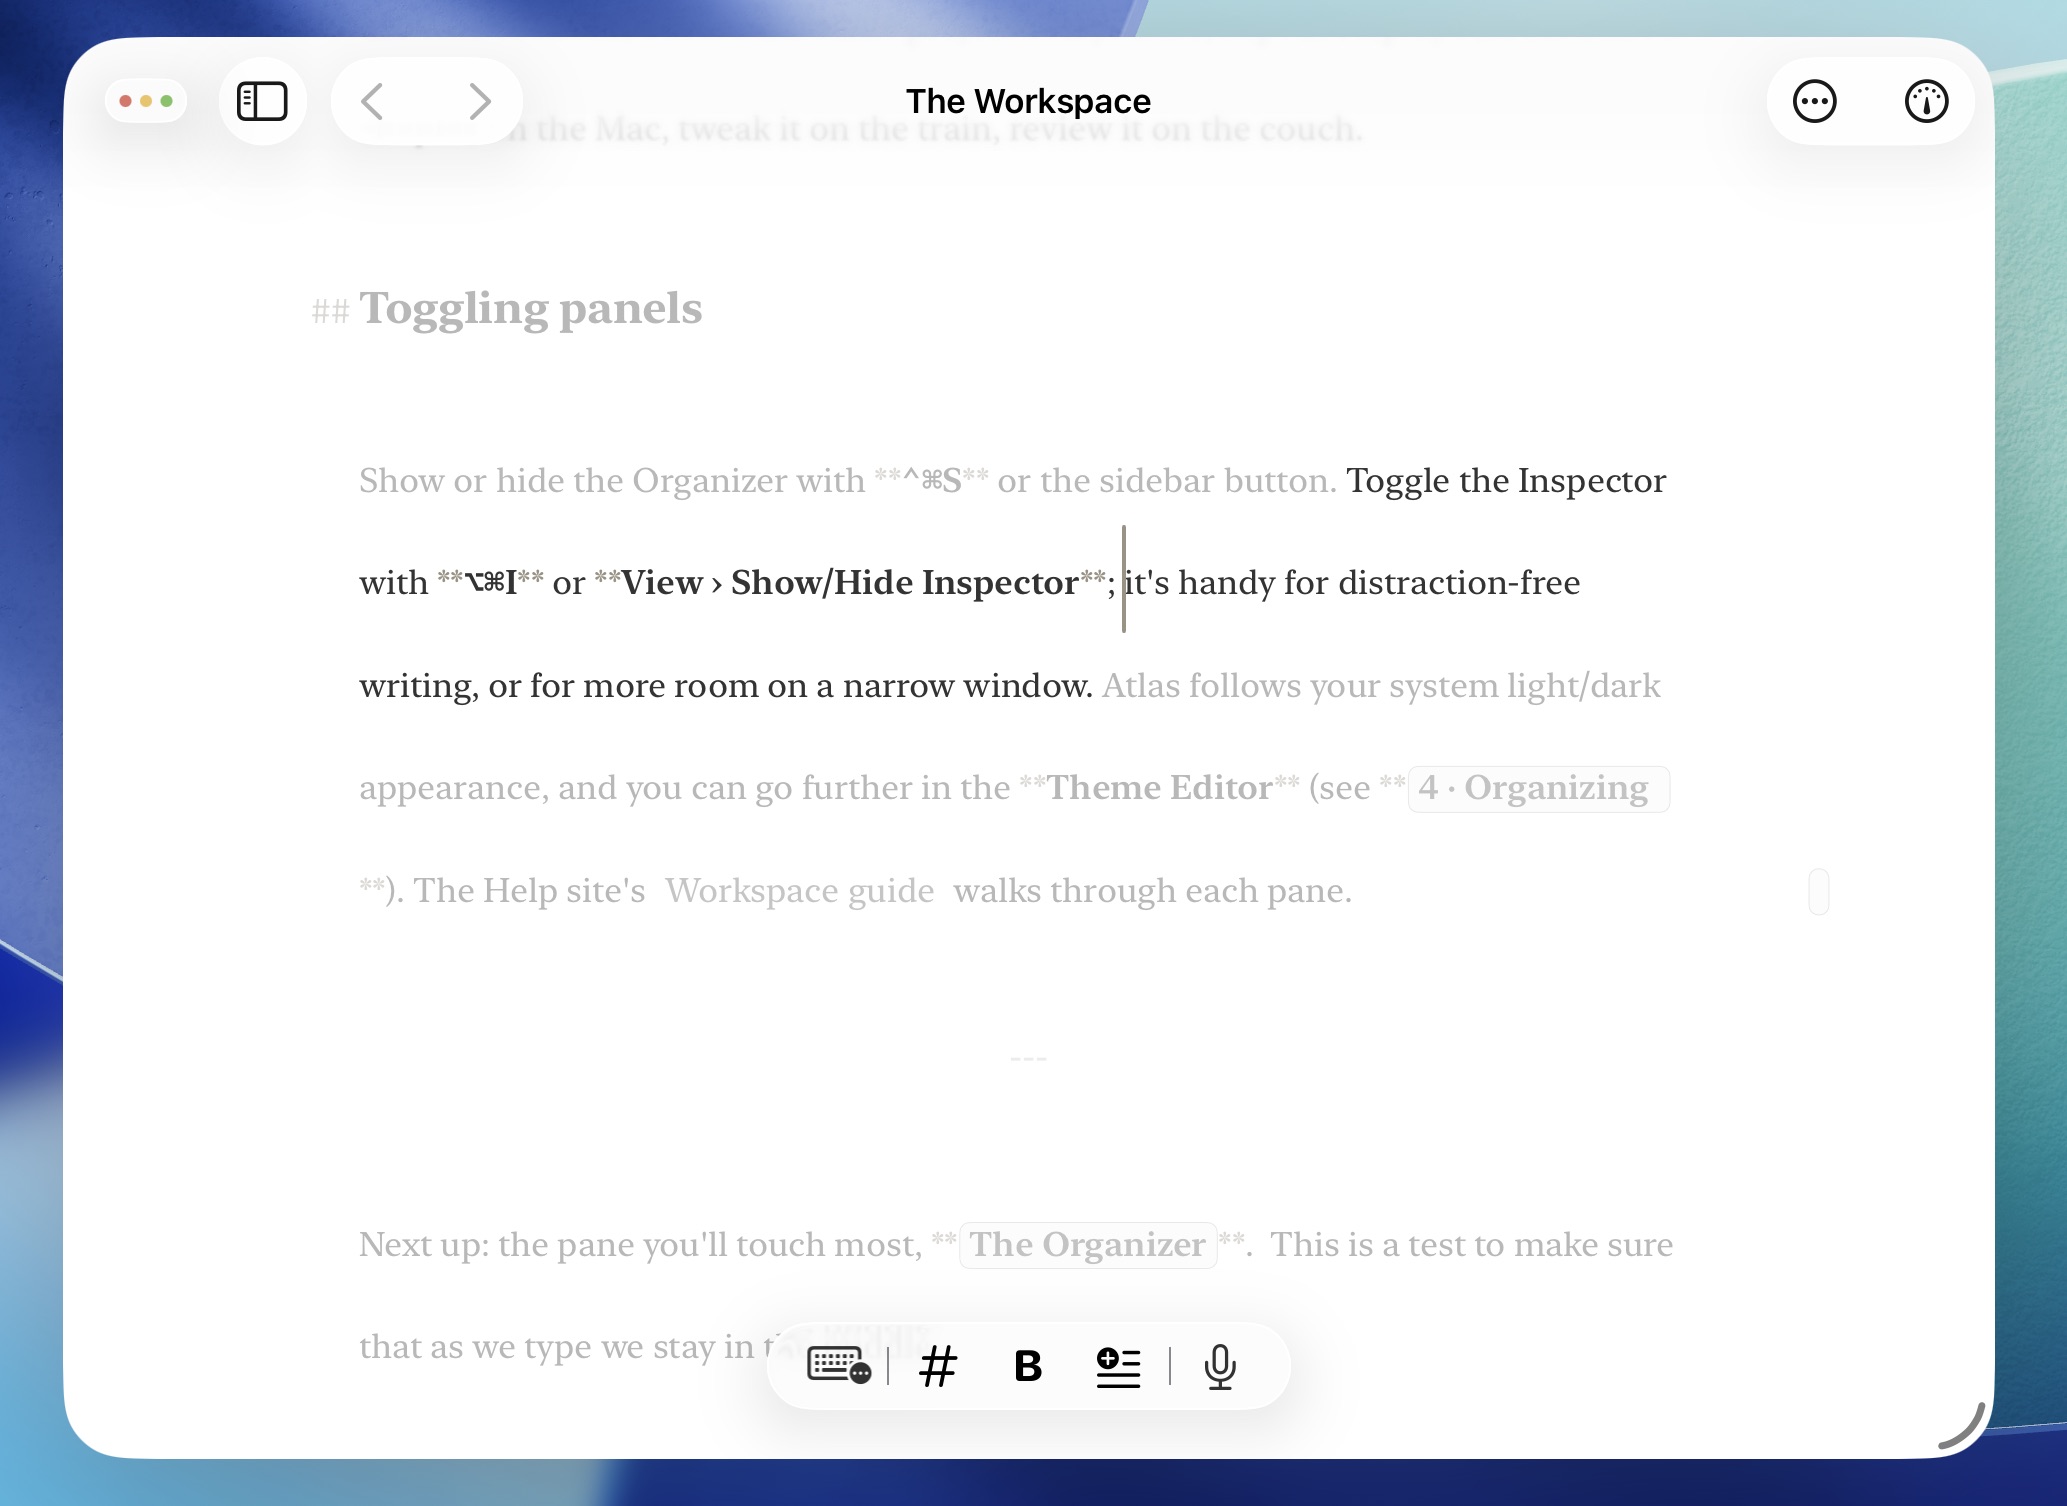
Focus Mode enabled on iPadOS
Focus Mode dims everything except the part of your document you're actively editing, so the current passage stands out while the rest recedes. Choose how much text stays in focus:
- Paragraph — keeps the active paragraph sharp
- Sentence — narrows focus to the current sentence
- Line — narrows focus to the current visual line
Set the granularity in Settings > Editor Styles (the Focus tab on Mac; the Focus Mode section on iPhone and iPad), or from the Focus Mode submenu in the editor's Editor menu. Choosing a granularity turns Focus Mode on; set it to Off to stop dimming. On Mac and iPad with a keyboard, Option+Cmd+G toggles Focus Mode and restores whichever granularity you used last.
The Dimming slider controls how far the surrounding text fades — drag it left for stronger dimming and right to let more text show through. At the far right, the surrounding text isn't dimmed at all.
Typewriter Scrolling
Typewriter Scrolling keeps the line you're editing pinned in place as you type, so your eyes stay put while the text scrolls beneath the cursor. Pick where the active line sits:
- Top — near the top of the editor
- Center — at the vertical center
- Bottom — near the bottom
- Variable — holds the line wherever it currently sits, rather than moving it to a fixed spot
Set the position in Settings > Editor Styles — the picker is labeled Fixed Scrolling, under Typewriter Scrolling — or from the Typewriter Scrolling submenu in the editor's Editor menu. Set it to Off to turn the feature off. On Mac and iPad with a keyboard, Option+Cmd+J toggles it on and off, and Shift+Cmd+J (Recenter Line in the menu) snaps the current line back to your chosen position.
Syncing Editor Settings
Editor preferences — your active theme, line height, and text size multiplier — can sync across devices via iCloud. Toggle this in Settings > iCloud.
A few editor settings stay local to each device: your custom font override, and whether Focus Mode and Typewriter Scrolling are currently switched on. Your chosen Focus granularity, Dimming level, and Typewriter position do carry across devices — but you switch each feature on or off per device.
Theme Importing and Exporting
Share and install custom themes using .atlastheme packages. Export a theme from its menu (Customize, Duplicate, Export, Delete) in Settings > Editor Styles. On Mac, Export saves the .atlastheme to a location you choose; hold Option to Share it through the share sheet instead. On iPhone and iPad, Export opens the share sheet. Import through the file picker or by opening a .atlastheme directly — Atlas registers it as a supported document type on both platforms. Deleting a custom theme asks you to confirm first.
Atlas can also import Ulysses .ultheme files, automatically converting them to Atlas themes.
Tip
The Ulysses website has a collection of compatible themes at https://styles.ulysses.app/themes
See The Theme Editor for details on creating and customizing themes.
See Also
- Writing with Markdown — The editor and formatting basics
- The Theme Editor — Creating and customizing themes
- Images and Sketches — Resizing images in the editor