The Workspace
The workspace is where you actually work on a project. When you open a project, its workspace fills the window — showing all active content and giving you a focused view of just that project.

The Workspace Window, showing the Navigator (Left), Issue Browser (Center), and an Open Issue (Right)
The Layout
On Mac and iPad, the workspace is built around three regions:
- Navigator (sidebar) — Issue groups, versions, and milestones. This is how you choose what you're looking at.
- Issue Browser (middle) — The issues belonging to whatever the Navigator has selected, displayed in your chosen view mode.
- Issue Detail (right) — The full view of the selected issue. Edit properties, write notes, add subtasks, attach files, and browse history.
Selecting something in the Navigator populates the Issue Browser; selecting an issue in the Browser populates the Detail. The middle region can be displayed as a List, Outline, or Board — see Viewing Issues for what each mode is good for and how to switch between them.
The Navigator
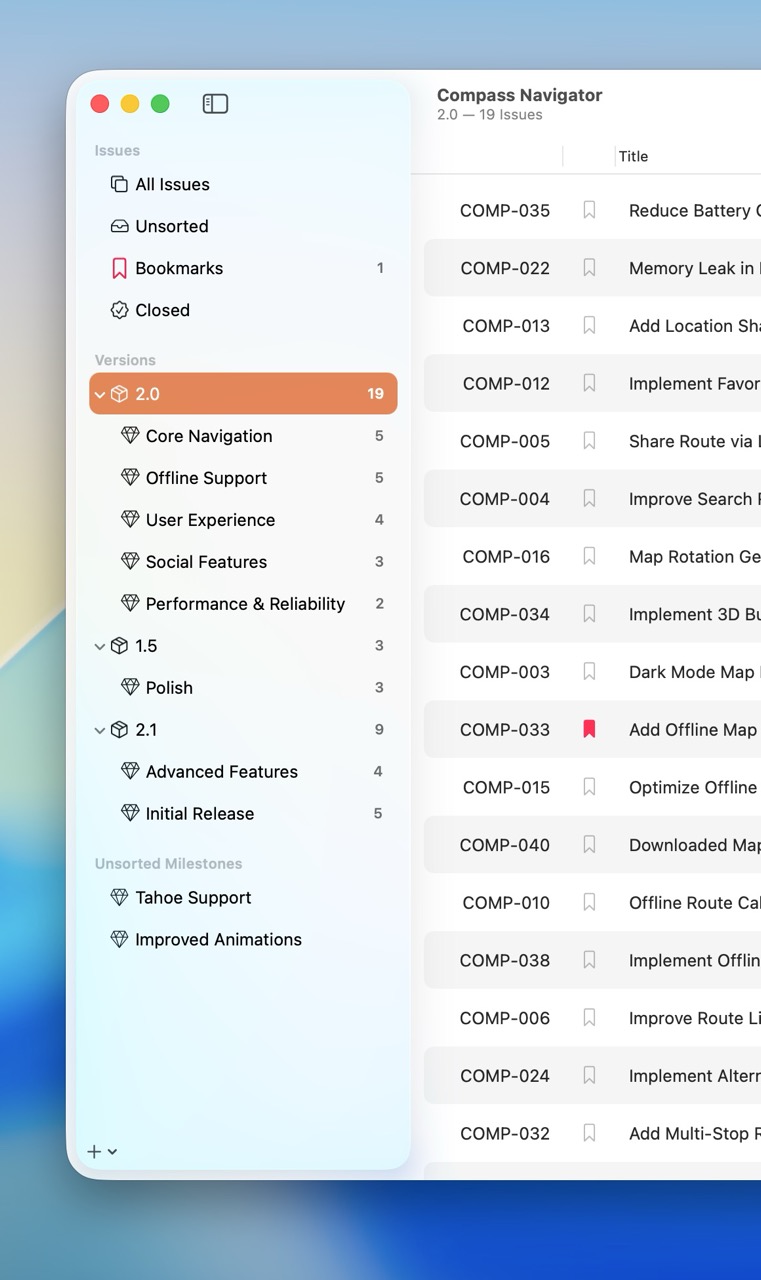
The Navigator
The Navigator is the sidebar that provides navigation across the entire project. It has two sections:
Issue Groups
Quick-access groupings at the top of the Navigator that filter every issue in the project by some criterion:
- All Issues — Every issue in the project
- Unsorted — Issues not assigned to a version or milestone (your backlog)
- Bookmarked — Issues you've flagged for quick access
- Due — Issues with due dates set
- Closed — Resolved issues
- Assigned To Me — Issues assigned to the current user
You can also add dynamic groups for any individual status or priority in the project — for example, a group that surfaces just the "In Review" issues, or just the Urgent ones.
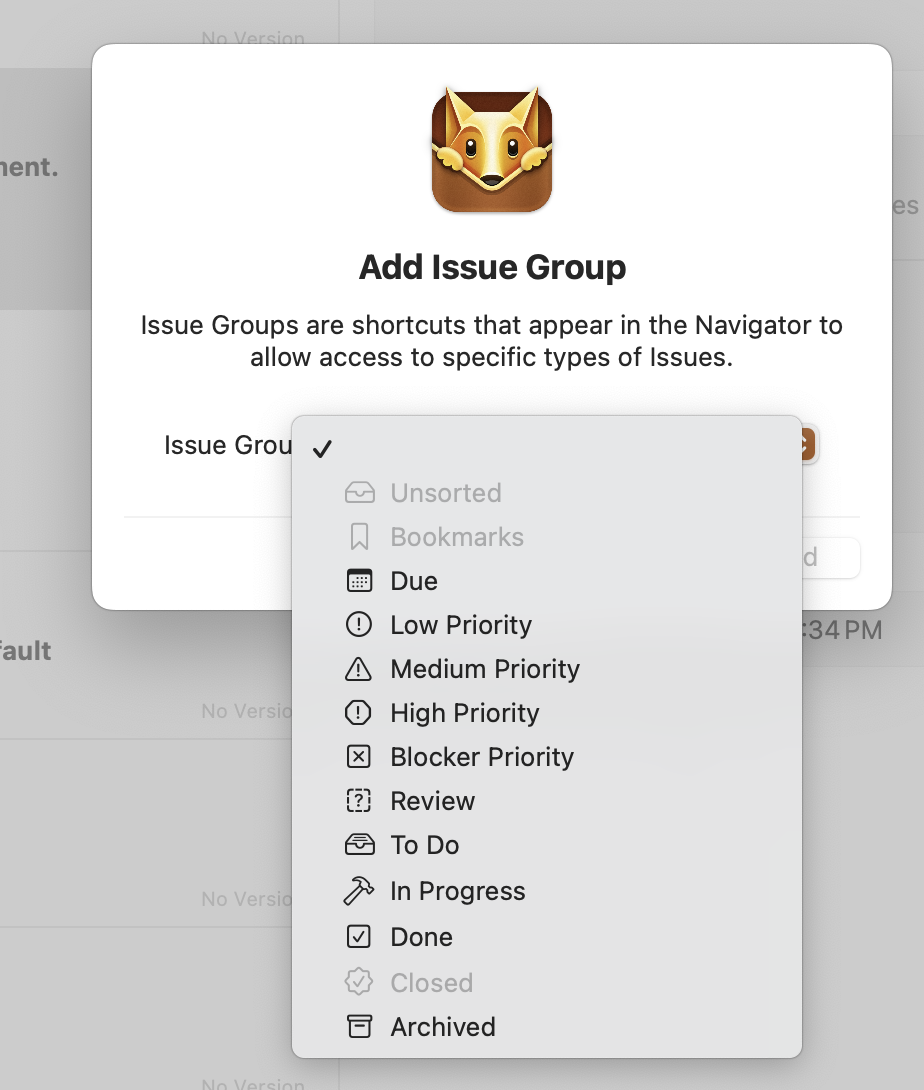
Adding Groups to the Navigator on macOS
Customizing which groups are shown:
- iOS — Tap the Edit button in the Navigator sidebar, then toggle groups on or off.
- Mac — View → Add Issue Group, then pick which group to add.
Each group displays a count of open issues beside it. Expansion and collapse state persists across sessions, and your Navigator configuration syncs across devices when iCloud is enabled.
Issue Groups are always viewed as a List — the Outline and Board mode picker segments are disabled when one is selected.
Versions & Milestones
Below the issue groups, the Navigator displays the project's organizational hierarchy. Versions expand to reveal their child milestones, and selecting any version or milestone scopes the Issue Browser to just the issues inside it. Milestones not assigned to any version can optionally be grouped under an Unsorted Milestones section — toggle via View → Group Unsorted Milestones or the sidebar context menu on the Versions header. See Versions & Milestones for how this hierarchy works.
Every Version and Milestone can be opened as a List, Outline, or Board, and each location remembers its last-used view mode. See Viewing Issues.
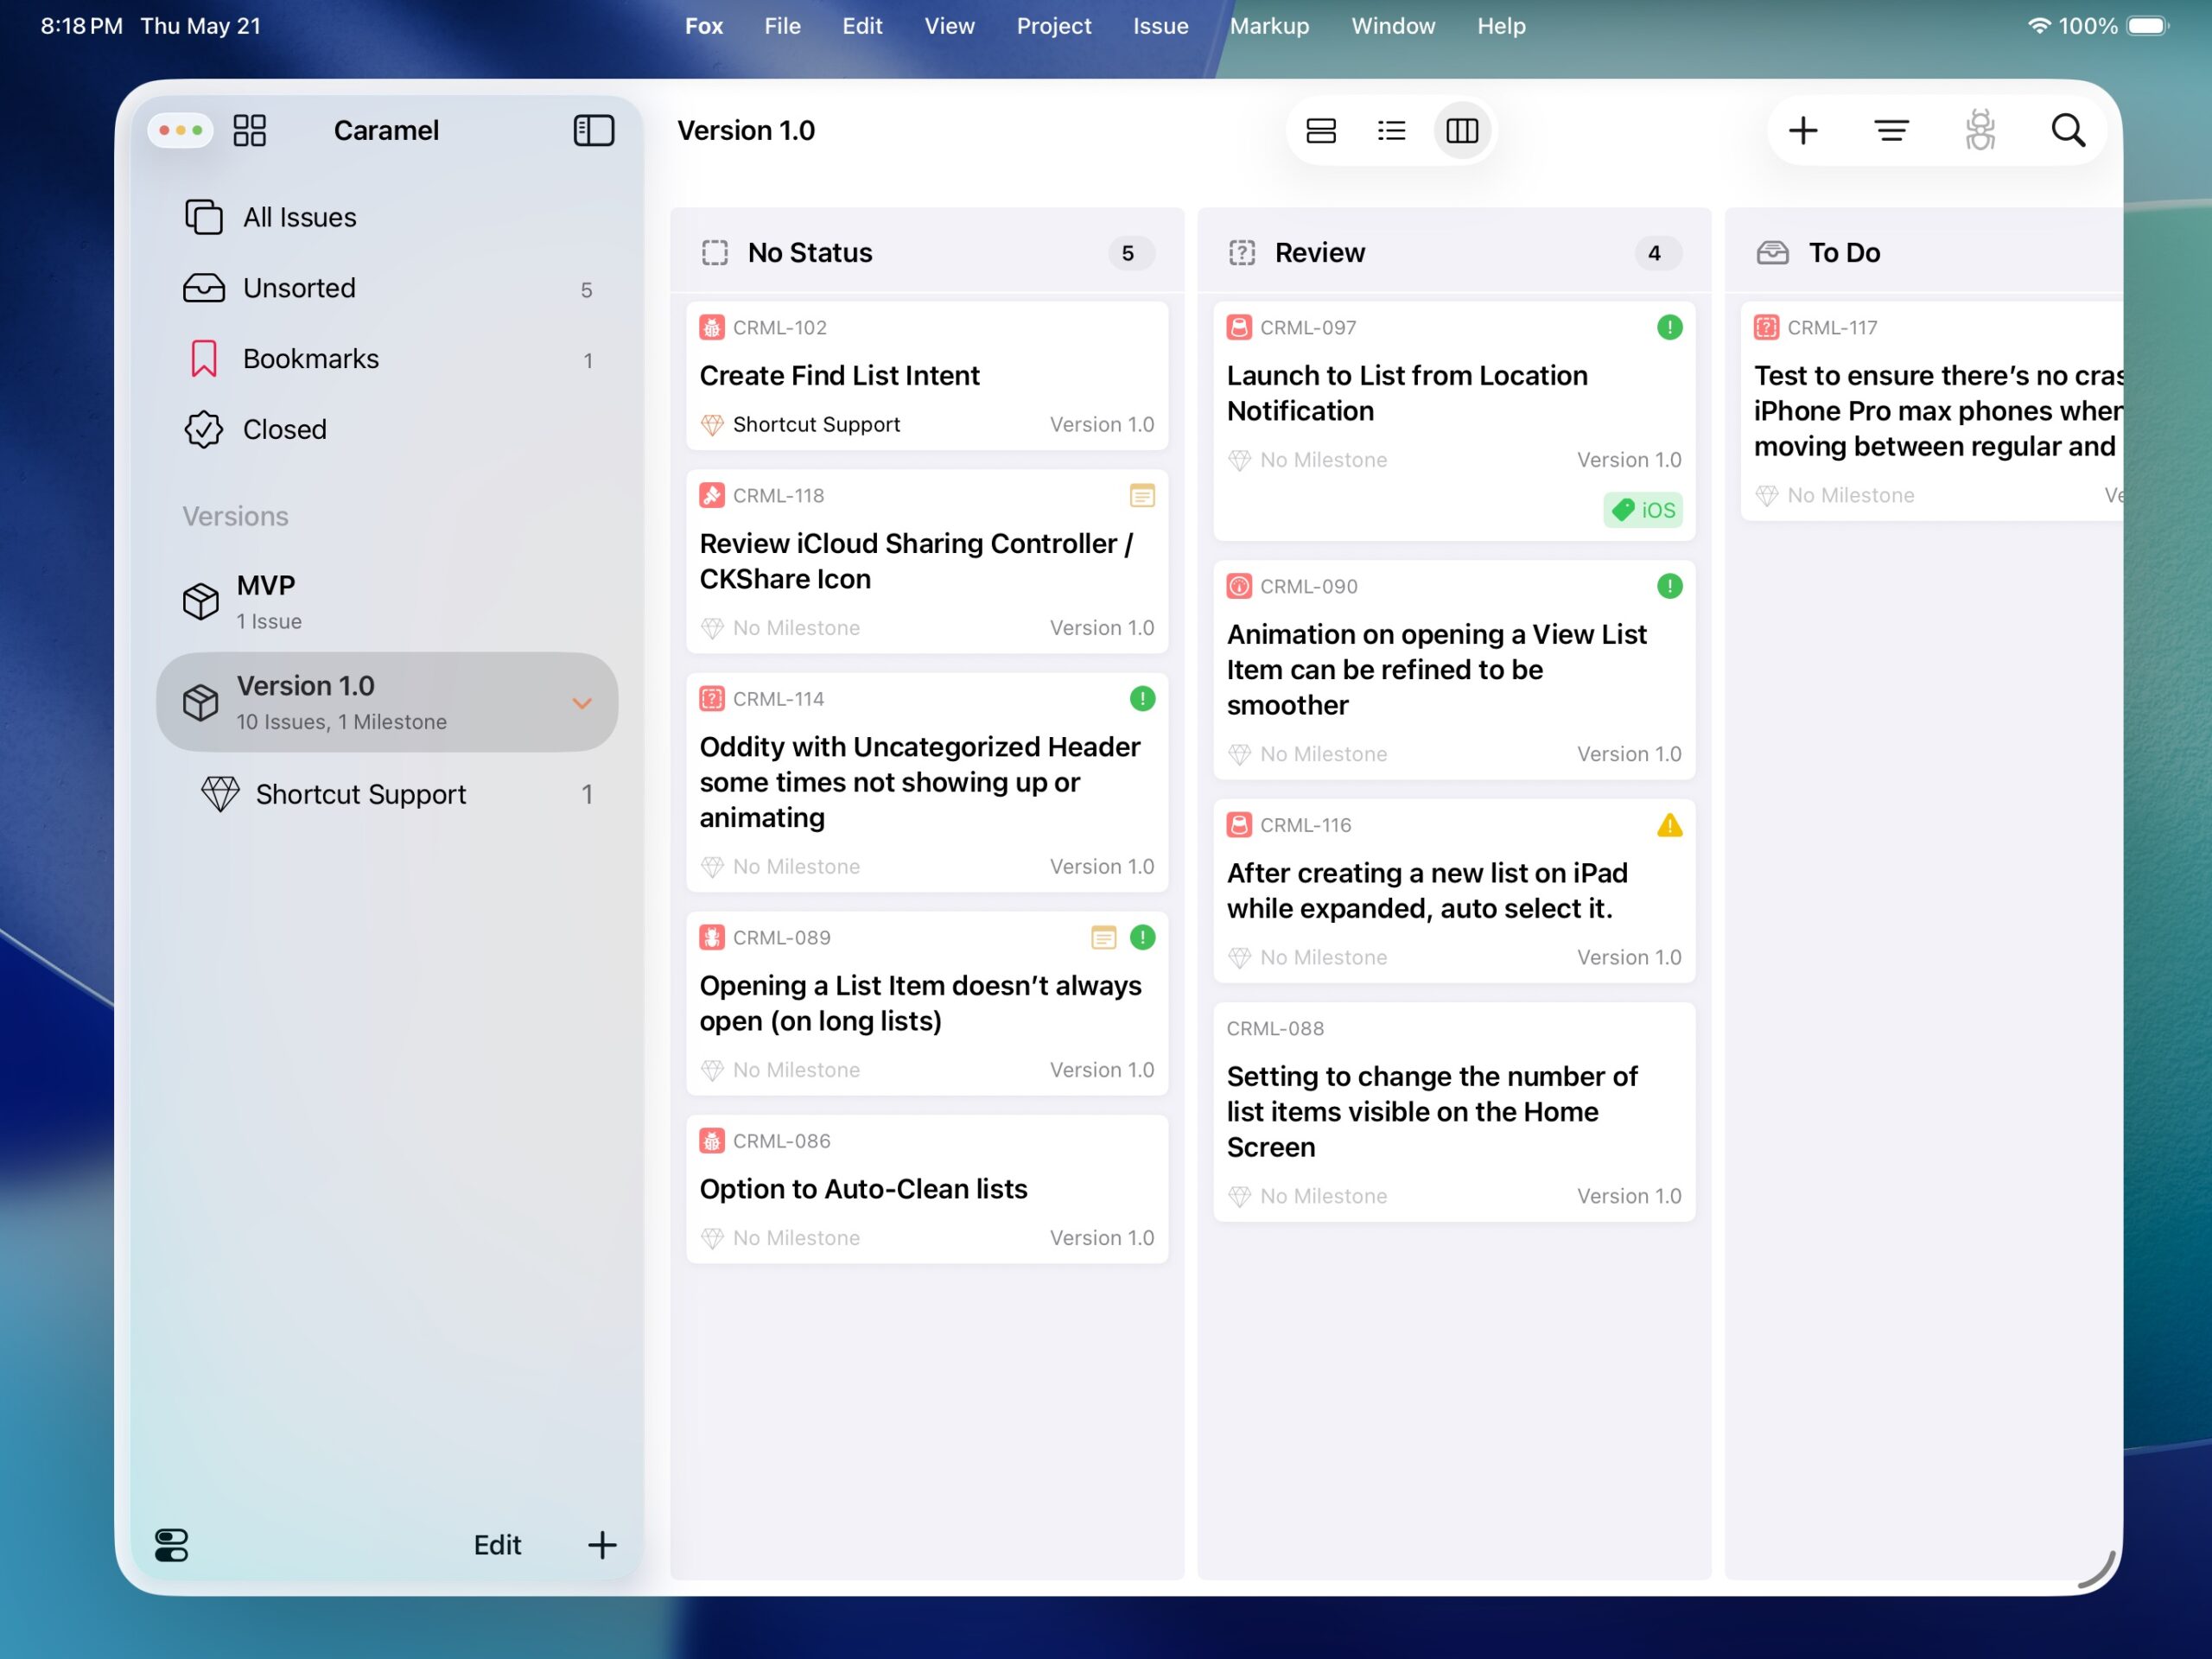
The Toolbar
A unified, mode-aware toolbar sits across the top of every workspace window:

The toolbar with, centered, the view mode picker.
- Sidebar Toggle — Show or hide the Navigator.
- View Mode Picker — Centered, pinned. Switch between List, Outline, and Board for the current location. Mirrored by the View → View As… submenu on macOS, with keyboard shortcuts.
- Add — Creates an issue scoped to whatever you're currently viewing (project, version, milestone, or issue group).
- Filter — A single menu whose contents change based on the active view mode:
- List — Show (Open / Closed / All), Sort By (Title, Status, Type, Priority, Milestone, Version, Date Opened, Date Closed, Estimate, Resolution, Date Added, Manual), Ascending / Descending.
- Board — Show No-Status Column, Sort By (Estimate, Date Added), Ascending / Descending, Resort Columns.
- Outline — (placeholder — coming in a future update).
- Modify — A consolidated per-issue action menu: Bookmark, Type, Priority, Add Attachment, Status, Close, Tags, Move. The pre-4.0 individual toolbar items (Bookmark, Type, Priority, etc.) are still available via View → Customize Toolbar if you prefer them spread out.
- Search — Opens the workspace search field with focus, regardless of where you tap from.
The Filter button stays enabled whether or not an issue is currently selected.
iOS Toolbar
The same set of controls adapts to compact layouts:
- Regular (wide) layout — Add, Filter, More, Search in the top trailing nav bar.
- Compact layout — The segmented picker moves to the trailing nav bar; Add, Filter, and Search drop into the trailing edge of the bottom toolbar. The More button (matching the macOS Modify icon) is hidden in compact since there's no inline selection there.
On iOS 26 and later, toolbar buttons get a bit of breathing room above the screen edge to match the new system look.
The Detail Column
The detail column behaves differently per view mode:
- List — Always visible. Selecting an issue immediately populates the detail.
- Outline & Board — Toggleable. Use View → Show/Hide Issue Detail Column (the menu title flips based on current state) or ⌘⇧D on a hardware keyboard. Each mode remembers its own visibility preference.
When the detail column is visible but nothing is selected, you'll see a no-selection placeholder rather than a blank panel.
Selection Behavior
| View Mode | Single Tap / Click | Double Tap / Click |
|---|---|---|
| List | Populates detail | Opens floating window (Mac) / pushes detail (iOS compact) |
| Outline | Populates detail (when visible) | Opens floating window / pushes detail |
| Board (detail visible) | Populates detail | Opens floating window / pushes detail |
| Board (detail hidden) | Marks card active on the board only | Opens floating window / pushes detail |
In Board mode, multi-select or no selection clears the detail to the placeholder. Toggling the detail column on with an issue already selected opens the detail straight to that issue, so you don't lose your place.
State Restoration and Handoff
Fox remembers exactly where you were when you closed the app:
- State restoration — Relaunching reopens each window to its source location, view mode, and selected issue.
- Handoff — Picking up a project on another device lands you on the same workspace state (project, location, mode, selected issue).
- Migration — Pre-4.0 saved state and Handoff activities migrate forward without data loss.
Platform Differences
Fox is a native app on every Apple platform, and the workspace adapts to each one.
- Mac — Full three-column layout with multi-window support. Each project opens in its own window, with full menu bar and toolbar integration.
- iPad — Full three-column layout, optimized for touch. Width-aware: the sidebar takes its own column on wider iPads and overlays content at narrower widths; rotates and resizes (Stage Manager, multitasking) cleanly. Issues opened from outside the workspace (Spotlight, a deep link, another app) get their own independent floating windows, so you can keep several issues visible at once. iPadOS 26+ supports the Liquid Glass design.
Fox on iPad
- iPhone — An adaptive, push-based layout for compact screens. You move between the Navigator, Browser, and Detail as separate views rather than seeing all three at once. The segmented view-mode picker moves to the trailing nav bar; Add, Filter, and Search live in the bottom toolbar.
All three platforms share the same data through iCloud — start on one device, continue on another. See iCloud Sync.
See Also
- Viewing Issues — The three view modes and when to use each
- List View — Sorting, filtering, and manual reorder
- Outline View — Spreadsheet-style inline editing
- The Board — Kanban movement
- Projects — What the workspace is a window into
- Issues — What lives in the Issue Browser and Detail
- Versions & Milestones — The hierarchy the Navigator displays
- Keyboard Shortcuts — Moving through the workspace without the mouse