The Editor
Atlas uses a hybrid live-rendering markdown editor — rich elements like images, links, and formatting (headings, emphasis, lists, and more) appear as you type. By default, the markdown characters behind that formatting (like the ** around bold text) stay hidden until you need them: move your cursor into a formatted span and its markers reappear for editing, then hide again once you move on.
To start writing, create a new text document from the Organizer using the + button, context menu, or the Cmd+N keyboard shortcut. The editor opens immediately, ready for text.
Why Markdown?
Markdown is a lightweight markup language that lets you add formatting to plain text using a few characters instead of a toolbar — # for a heading, ** for bold, > for a quote. You never leave the keyboard to reach for a button, and it produces documents that can export to HTML, ePub, PDF, and more, styled independently from how you prefer to write.
Documents written this way are also portable, editable by any text editor, and future-proof — plain text outlives any one app. Where Atlas diverges from the standard Markdown spec to add features like annotations or document variables, it aims to stay close to conventions used by other popular editors for the best compatibility.
You can read more about the format itself at the Markdown Guide. This page covers the editor — what it looks like and how to control it. For the full formatting syntax reference, see Writing with Markdown.
Info
Most of the content for these help documents was written and edited in Atlas and exported to raw Markdown for other services, like the Help book or this website!
Making It Comfortable to Write In
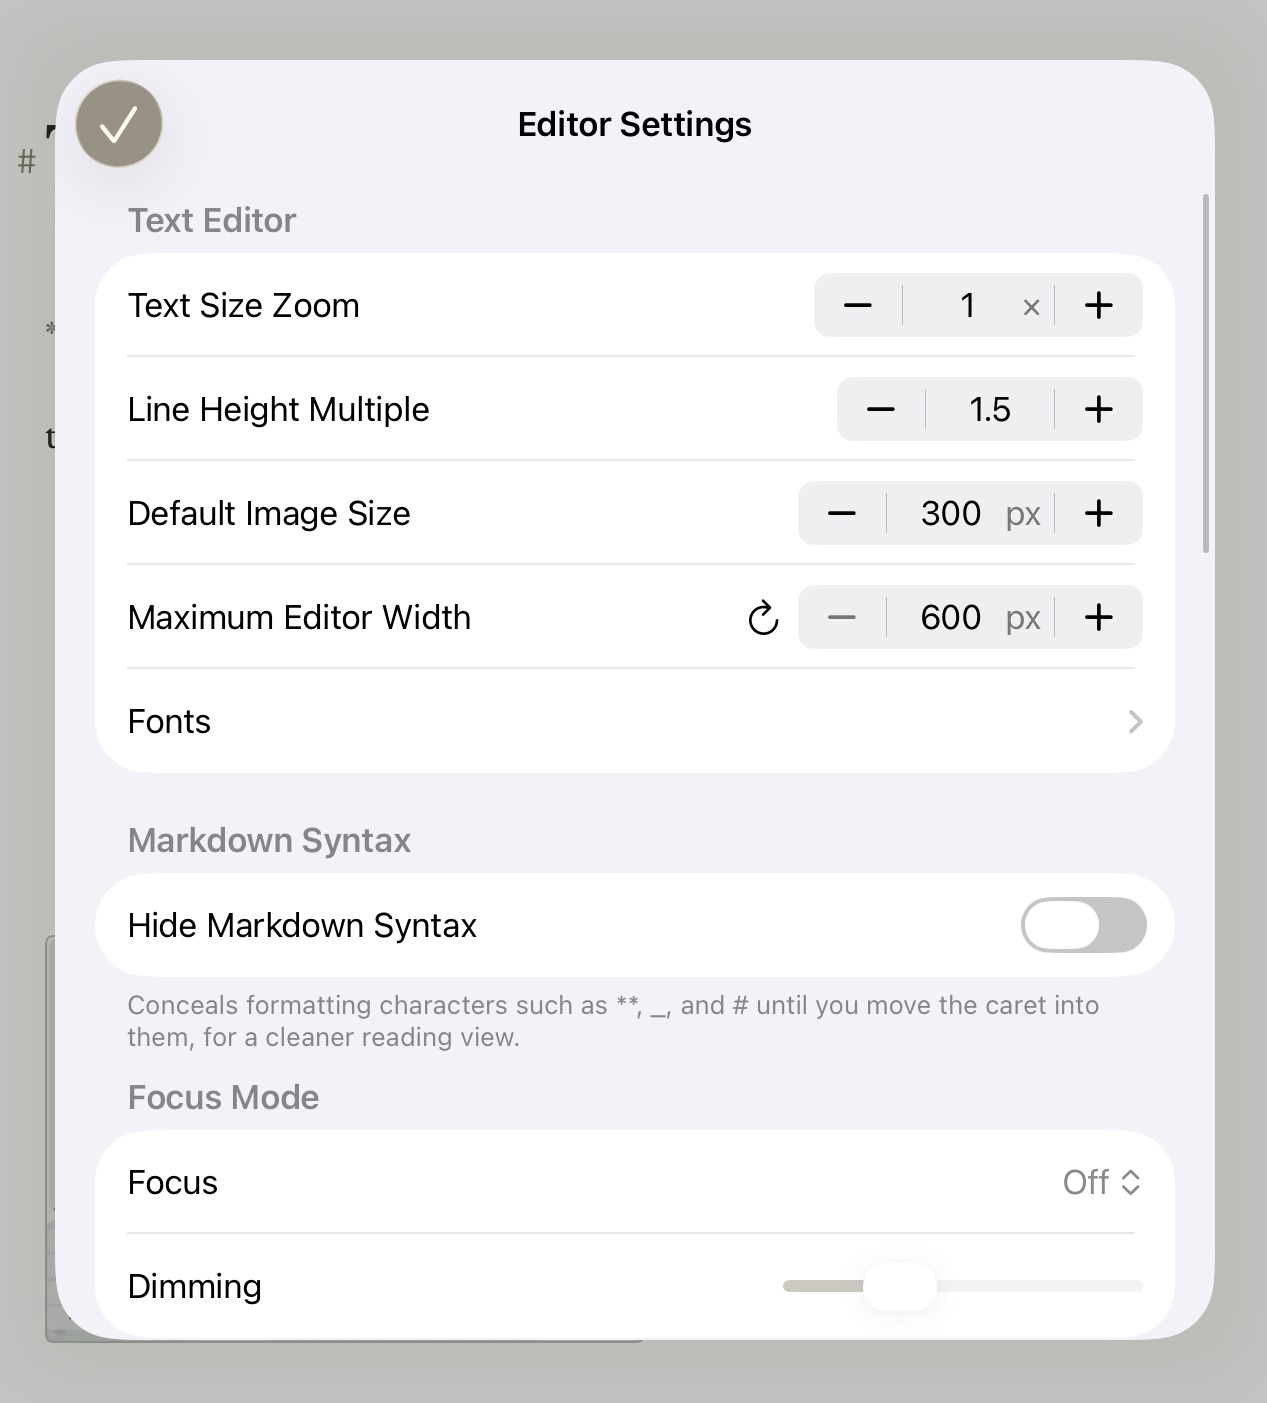
Editor Settings on iOS
A writing environment that fights you — text too small, too much on screen, a theme that doesn't suit your eyes at 11pm — costs you focus before you've written a word. Atlas separates how the editor looks and feels from how your documents look when published, so you're free to set up something that's comfortable for you specifically, without touching how anything exports.
- Themes — Seven built-in themes (Nifty, Typist, Oolong, Birds of Paradise, Solarized, Natural, and Monochrome), each with light and dark variants, or design your own per-element in the Theme Editor. Switch instantly in Settings > Editor Settings, no restart or reopen needed.
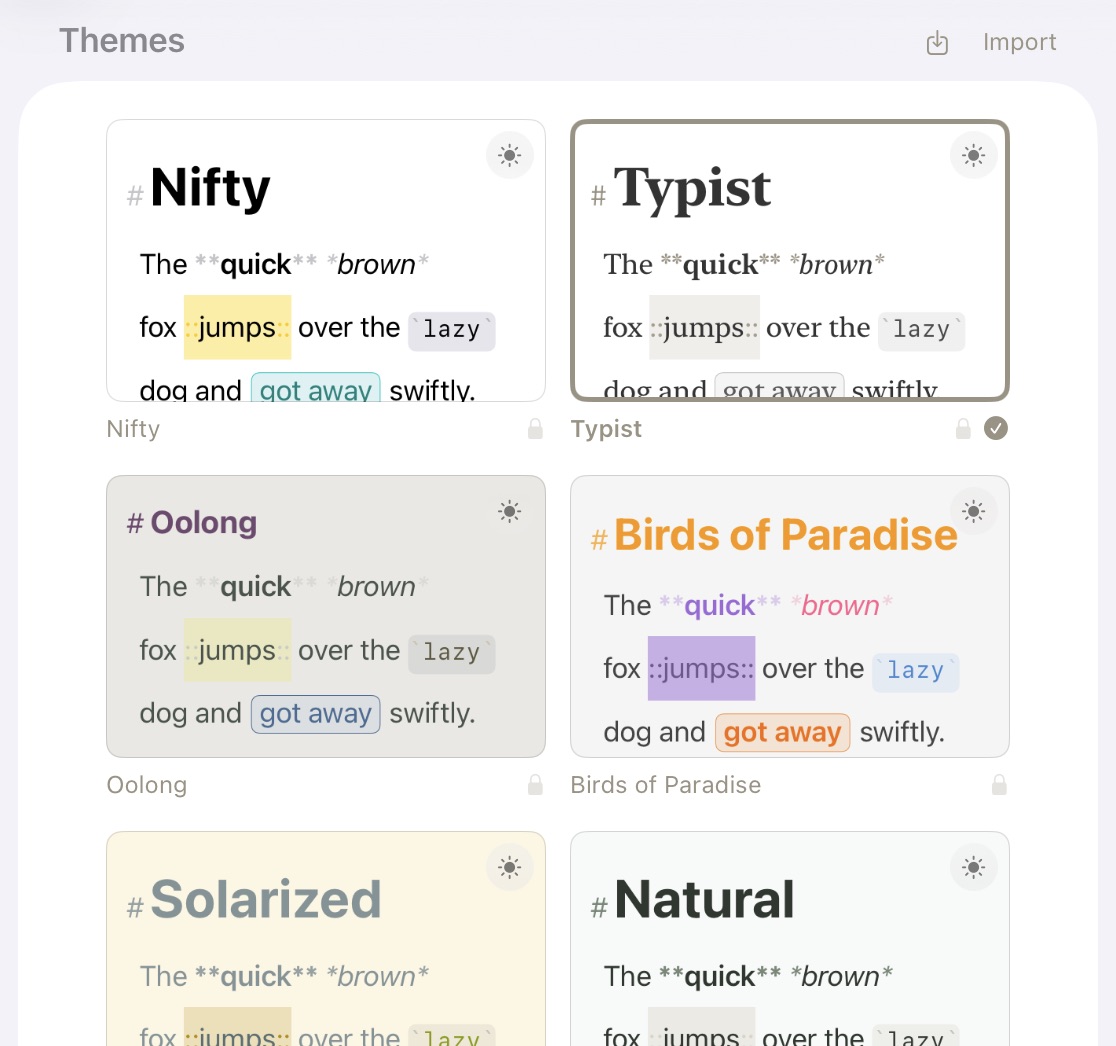
Themes included with Atlas
- Text size and line height — Independently adjustable, so dense technical writing and long-form prose can each get the spacing that makes them easiest to read.
- Custom fonts — Swap in anything installed on your device, per role (Standard, Serif, Monospace) or all at once, without editing the theme itself.
- Focus Mode — Dims everything on the page except the paragraph, sentence, or line you're actively writing, so one thought gets your attention instead of the whole document competing for it. Especially useful for drafting, or any time the page itself is what's distracting you. Toggle with Option+Cmd+G.
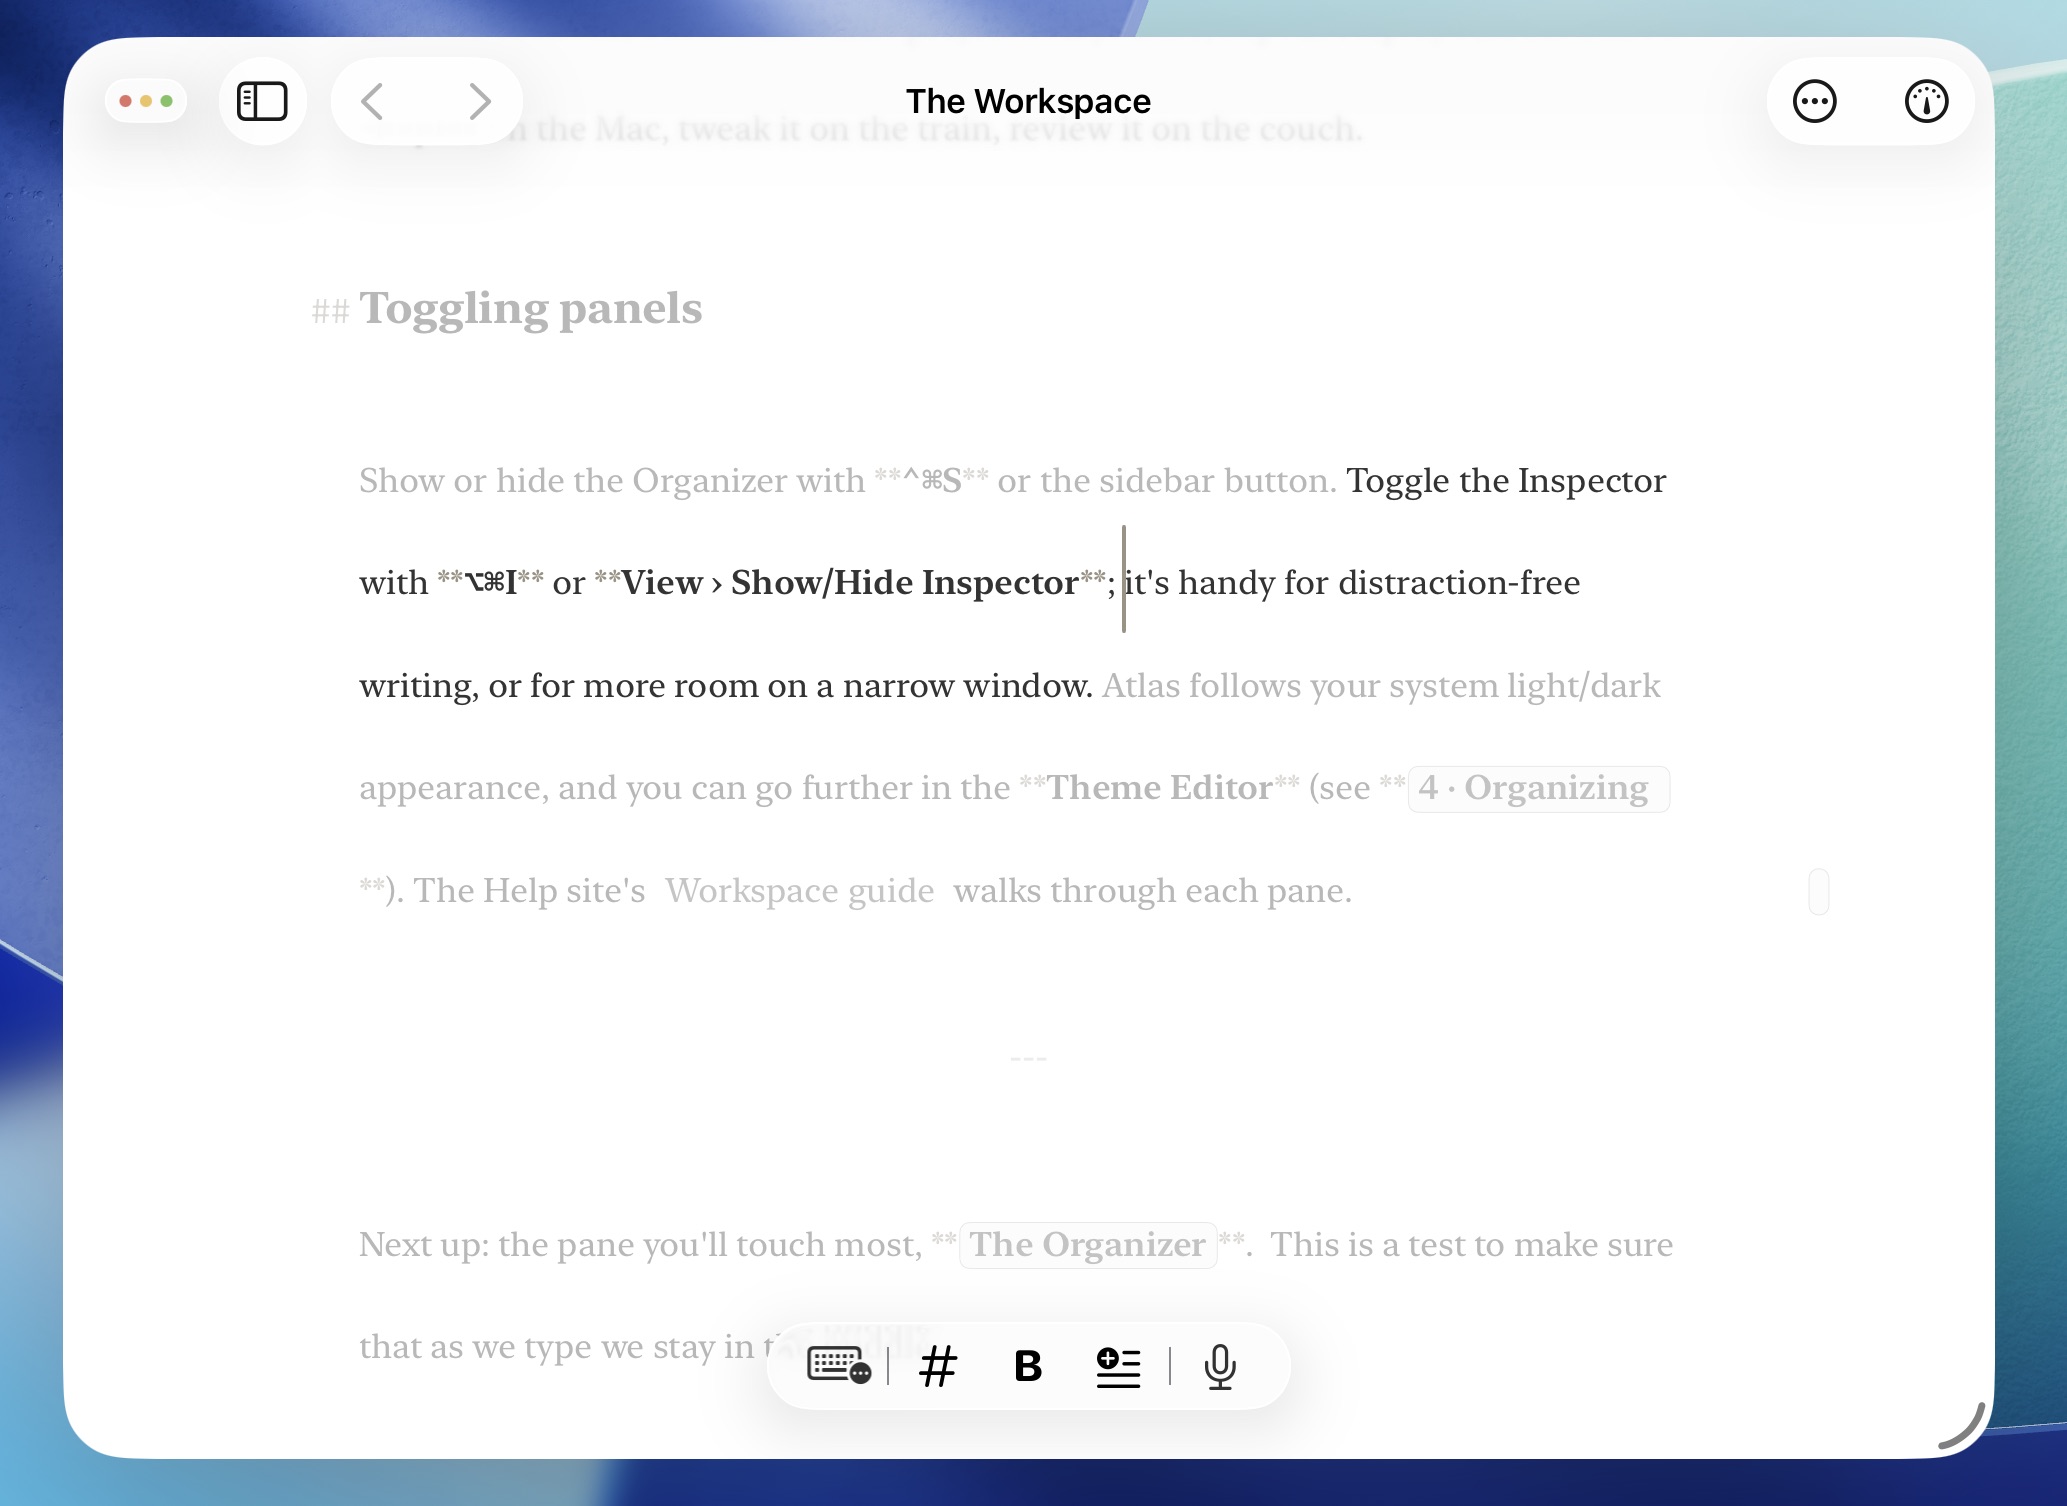
Focus Mode enabled on iPad, dimming text to help you... well... focus!
- Typewriter Scrolling — Pins your current line to a fixed spot on screen — Top, Center, or Bottom — so the page scrolls to meet you instead of your eyes chasing the cursor down and off the screen during a long session. Toggle with Option+Cmd+J.
None of this affects your exported documents — that's governed separately by Custom Export Styles. See Customizing the Editor for the complete settings reference, including line height ranges, editor width, and how these preferences sync across your devices.
Show or Hide Markdown Syntax
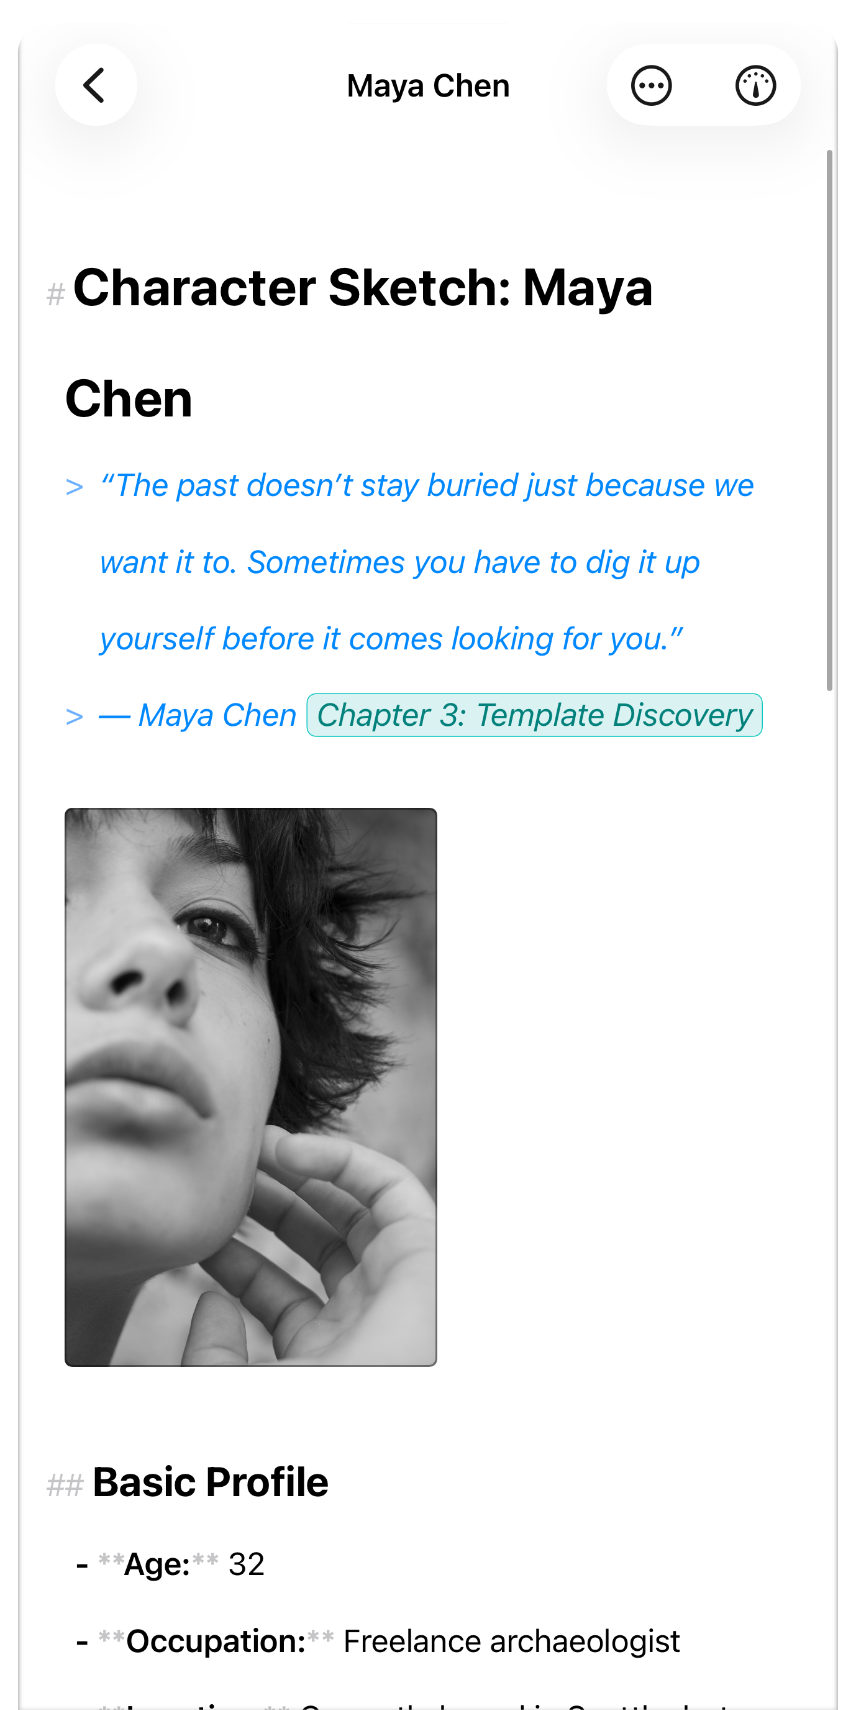
Markdown Syntax visible in the iOS app
Markdown characters — the **, _, #, and similar markers behind your formatting — stay hidden by default, so the page reads more like a finished document while you write. Move your cursor or tap into a formatted span and its markers reappear so you can edit them directly; move on and they hide again.
You can turn this off if you'd rather see markdown syntax at all times. Use the editor's Editor menu → Hide Markdown / Show Markdown (Option+Cmd+R) for a quick toggle, or set it permanently in Settings > Editor Settings — see Customizing the Editor.
Formatting Controls
Both platforms provide quick-access formatting tools so you don't need to remember syntax.
iOS — Formatting Keyboard
A dedicated formatting keyboard appears above the system keyboard when editing. It adapts its layout for iPhone and iPad screen sizes, providing buttons for all text styles, headings, lists, blockquotes, horizontal rules, links, images, annotations, footnotes, and a quick hashtag insert.
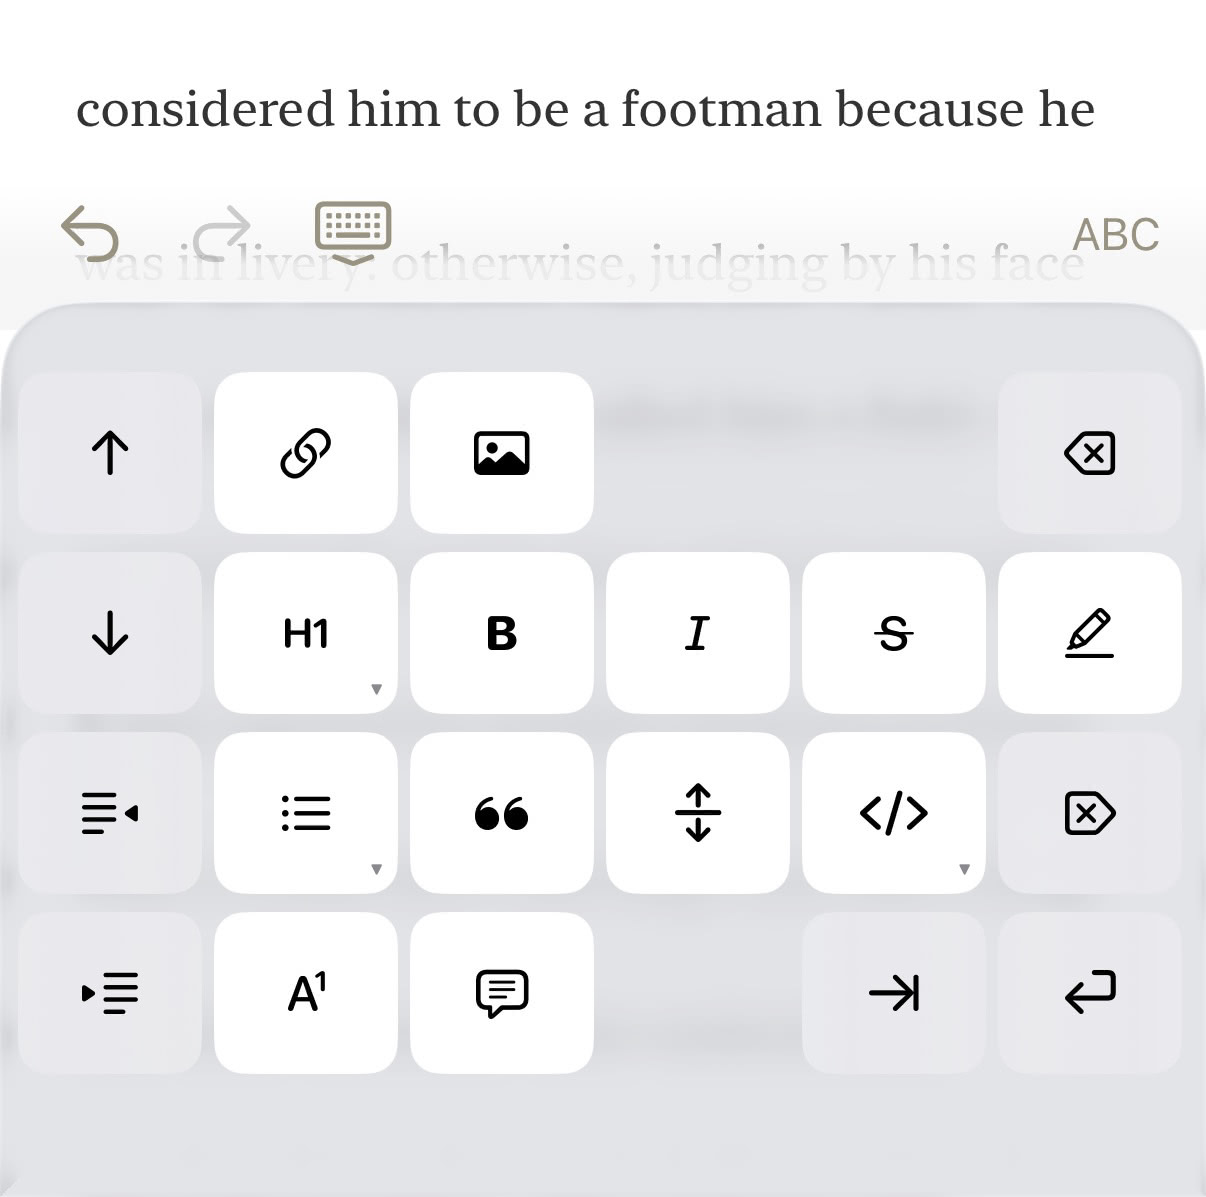
The iOS formatting keyboard
Mac — Floating Formatting Bar
A formatting bar is anchored to the bottom of the editor, providing the same quick-access options. When no text is selected, its Text Format button opens a menu for Bold, Italic, Strikethrough, Highlight, and Link — so you can apply inline styles without selecting text first. Toggle the bar's visibility from Editor > Show/Hide Formatting Bar (Option+Cmd+K). It's enabled by default.

The macOS formatting bar
Info
The formatting keyboard and bar are also available in the canvas text editor and template editors.
Indenting Paragraphs and Blockquotes
Indent a paragraph or blockquote to set it apart from surrounding text — useful for asides, nested quotes, or wrapped dialogue:
- Tab / Shift+Tab — indents or outdents every line touched by your selection
- Cmd+] / Cmd+[ — the same indent and outdent, from the keyboard or the Markup menu
- Typing four spaces at the start of a line also counts as one indent level
This is the same shortcut Atlas already uses to indent list items — it figures out from context whether you're indenting a list, a paragraph, or a blockquote.
Blockquotes can always be indented this way. Plain paragraphs only respond to these commands when Indent Wrapped Paragraphs is on in Editor Settings (on by default) — see Customizing the Editor. With it off, Tab types a literal tab instead, and any existing leading tab is left alone as ordinary text.
Info
On iOS without a hardware keyboard, the Indent and Dedent buttons on the on-screen formatting keyboard do the same thing as Cmd+]/Cmd+[.
Continuing onto new lines — press Return inside a blockquote and its > marker carries onto the new line, so you can keep quoting without retyping it. An indented paragraph works the same way: press Return and the new line keeps the same indent. Press Return again on that now-empty line and the indent clears completely, back to the left margin in one step — not one level at a time.
Exported files strip a paragraph's leading indent when Indent Wrapped Paragraphs is on, so other markdown tools don't misread it as a code block; turn the setting off and a leading tab exports exactly as typed. A blockquote's indent is always stripped on export regardless of the setting — only its > marker carries through.
Finding and Replacing Text
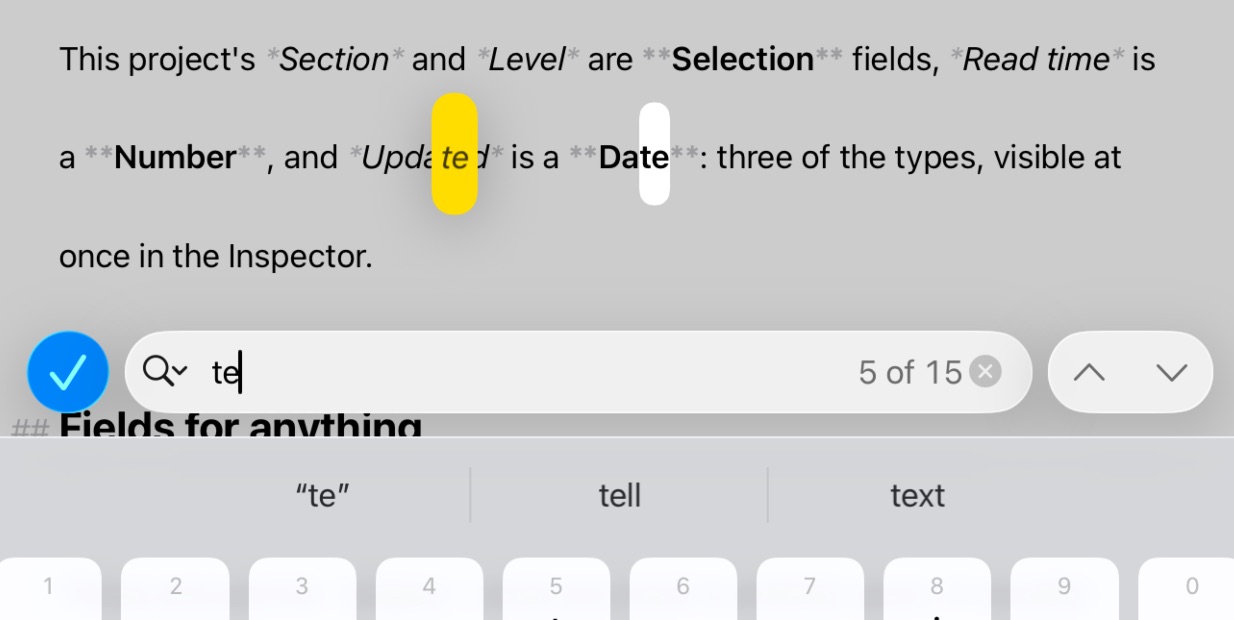
The Find and Replace UI on iOS
Atlas uses the system find bar in the Markdown Editor so you can search within the current document at any time. Use Cmd+F to show it or select Find in Document in the menu.
The find bar shows a live match count and gives you case-sensitive and whole-word toggles. Toggle Replace in the find bar to reveal the replacement field — from there you can replace the current match or replace all matches in the document at once. Find and Replace matches your text whether markdown syntax is currently shown or hidden, and works inside table cells, too. Find and Replace is scoped to the document you're currently editing; to search across an entire project, use Atlas's search instead. See Searching.
iOS and iPadOS
Open the editor's More menu in the toolbar and choose Find in Document. With an external keyboard attached, Cmd+F opens the same find bar directly.
macOS
Press Cmd+F in the editor to open the find bar. Use Cmd+G to jump to the next match and Cmd+Shift+G to jump to the previous match.
Converting to and from Markdown on Copy and Paste
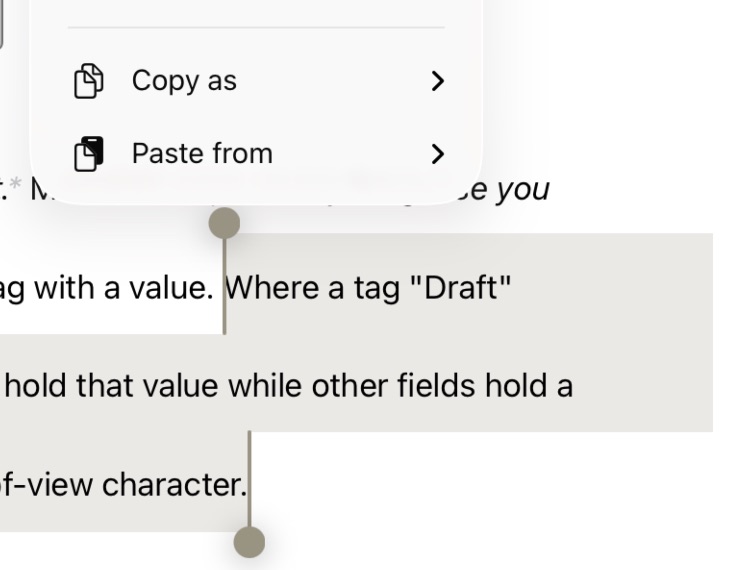
The Copy as and Paste from menus in the iOS selection context menu
Atlas stores your writing as Markdown, but the Edit menu can move text in and out in other formats — converting on the way through — so you're not stuck hand-cleaning markup when you copy into or paste from another app.
Copy as
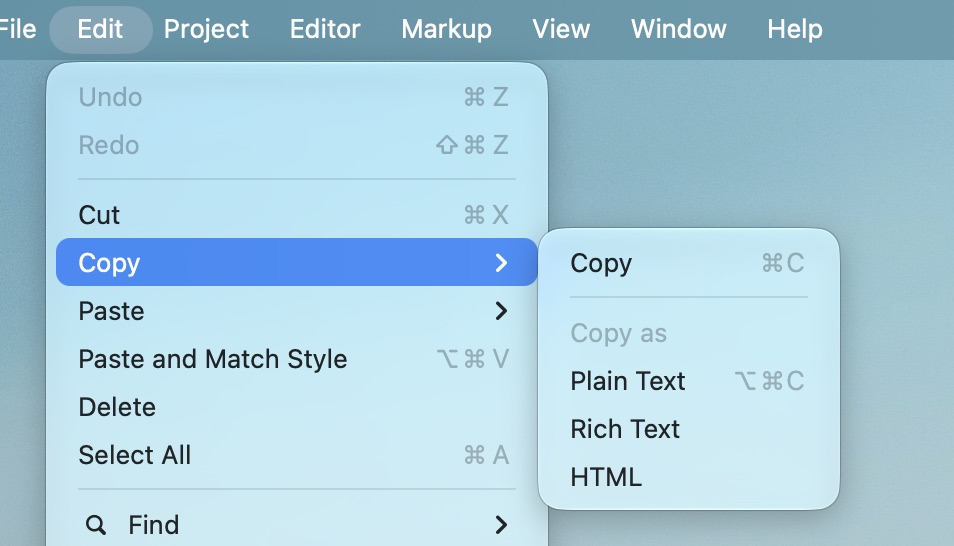
The Copy as menu on macOS
The default Copy (Cmd+C) copies your selection as Markdown. The Copy menu also offers Copy as:
- Plain Text (Option+Cmd+C) — the selection with Markdown markers stripped
- Rich Text — formatted rich text (RTF), for pasting into a word processor or email
- HTML — rendered HTML source
Paste from
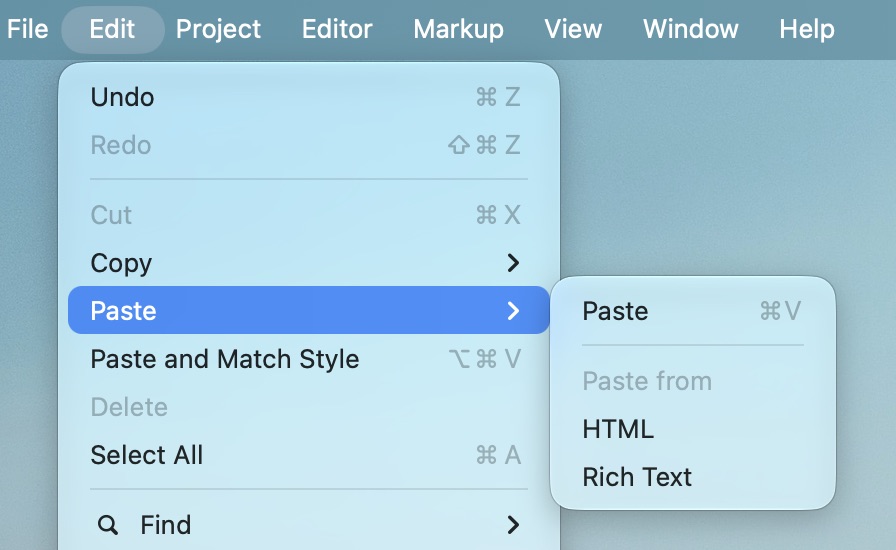
The Paste from on macOS
The default Paste (Cmd+V) brings the clipboard in as Markdown. The Paste menu also offers Paste from to convert other formats into Markdown as they land:
- HTML — clipboard HTML converted to Markdown
- Rich Text — clipboard rich text converted to Markdown
The available options adjust automatically to what's on the clipboard and to the editor you're working in.
Info
These commands live in the Edit menu on Mac and in the hardware-keyboard menu bar on iPad. To copy a table as Plain Text, CSV, Markdown, or HTML, see Copying Tables in Different Formats.
Escape Characters
Markdown lets you prefix a special character with a backslash to keep it literal — for example, \*not italic\* renders as *not italic*. Atlas highlights backslash escapes in the editor so you can see at a glance where you've used them, and strips the backslashes from the final output when exporting to HTML, ePub, or PDF, so readers see only the intended character.
See Also
- Writing with Markdown — The full formatting syntax reference, in depth
- Images and Sketches — Embedding images and creating sketches
- Linking — Connecting documents with internal and external links
- Annotations and Footnotes — Adding commentary and reference notes
- Customizing the Editor — Themes, text size, and line height
- The Theme Editor — Creating and customizing editor themes
- The Inspector — Writing statistics and document outline
- Keyboard Shortcuts — Find, editing, and navigation shortcuts