Metadata and Tags
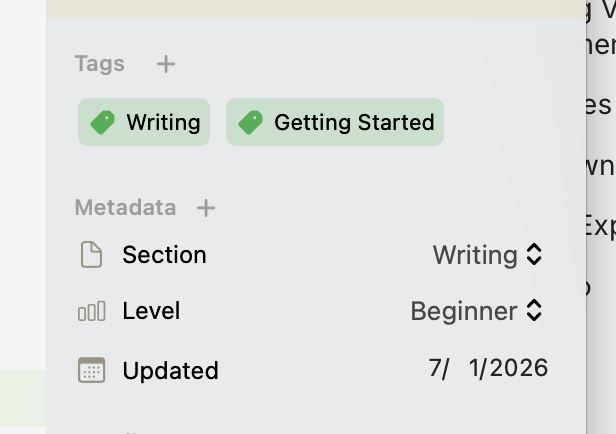
Tags and Metadata in the Inspector
Folders give your project physical structure, but tags and metadata let you layer meaning on top of it. Tags are simple labels — "Draft," "Chapter," "Needs Review" — that a document can wear any number of at once. Metadata takes that a step further: typed fields you define per project, so instead of just a "Status" tag you can track a word count target, a due date, or a point-of-view character as real structured data. Use tags for quick categorical labels, and metadata when you need an actual value attached.
Tags
Creating Tags
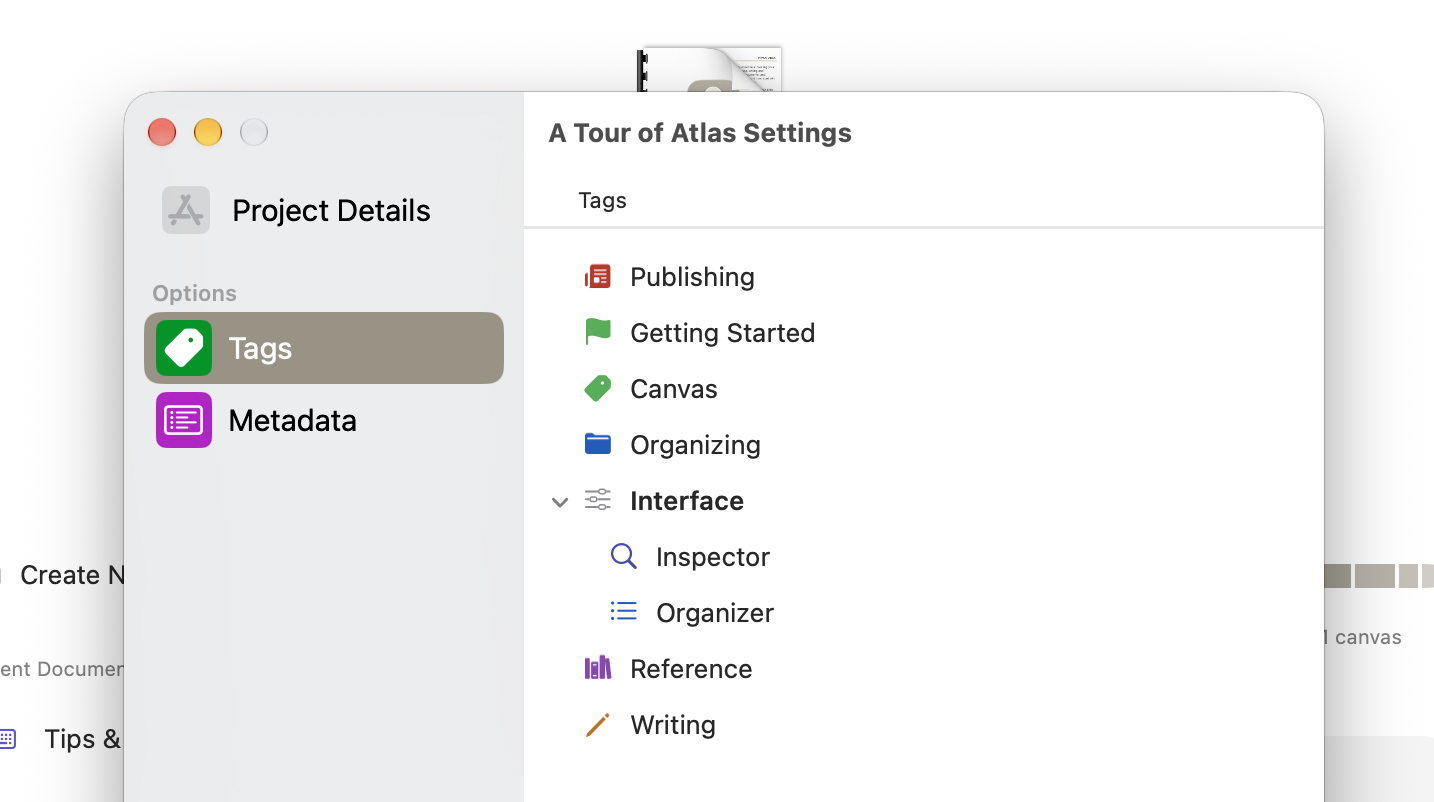
Editing Tags on macOS
Tags are managed per project and can be updated in the Project Settings window. Each tag has three properties you can customize:
- Name — A descriptive label (e.g., "Draft," "Character," "Primary Source")
- Color — A custom color that appears alongside the tag throughout the app
- Icon — Chosen from a built-in catalog of over 400 icons across 15 categories, searchable by name and keyword
To create a tag in the Inspector:
- On iOS: Open the Inspector's Overview panel, go to the Tags section, and tap the + button to open the Select Tags picker. Use the Search tags field to filter your project's tags; if nothing matches what you've typed, a Create new Tag row appears — tap it to make a tag with that name and set its color and icon. A tag you create this way is applied to the document automatically, so there's no need to find and tick it afterward.
- On macOS: Open the Inspector's Overview panel and tap the + button. Type a tag's name directly in the search bar to either select an existing tag or create a new one.
Tags can be created, edited, and deleted in Project Settings. On iOS, the Manage Tags editor there has the same Search tags field for finding a tag quickly in a large project.
Hierarchical Tags
Tags support parent-child relationships with unlimited nesting, which is useful when you need categories at different levels of specificity. For example, you might create a "Status" parent tag with "Draft," "Revised," and "Final" as children — or a "Characters" tag with "Protagonist," "Antagonist," and "Supporting" nested beneath it. Searching for a parent tag will also include any children tags as well.
Hierarchical tags let you filter broadly (by parent) or precisely (by a specific child), depending on what you're looking for.
Where Tags Show Up
Once assigned, tags appear in several places:
- The Inspector — alongside the document's other metadata
- The Folder Outline View — toggle tag visibility to see tags beneath each document title, giving you a quick sense of what's what as you scan a folder
- Search results — tags are searchable and can be used as query token filters — see Searching
Metadata
Defining Fields
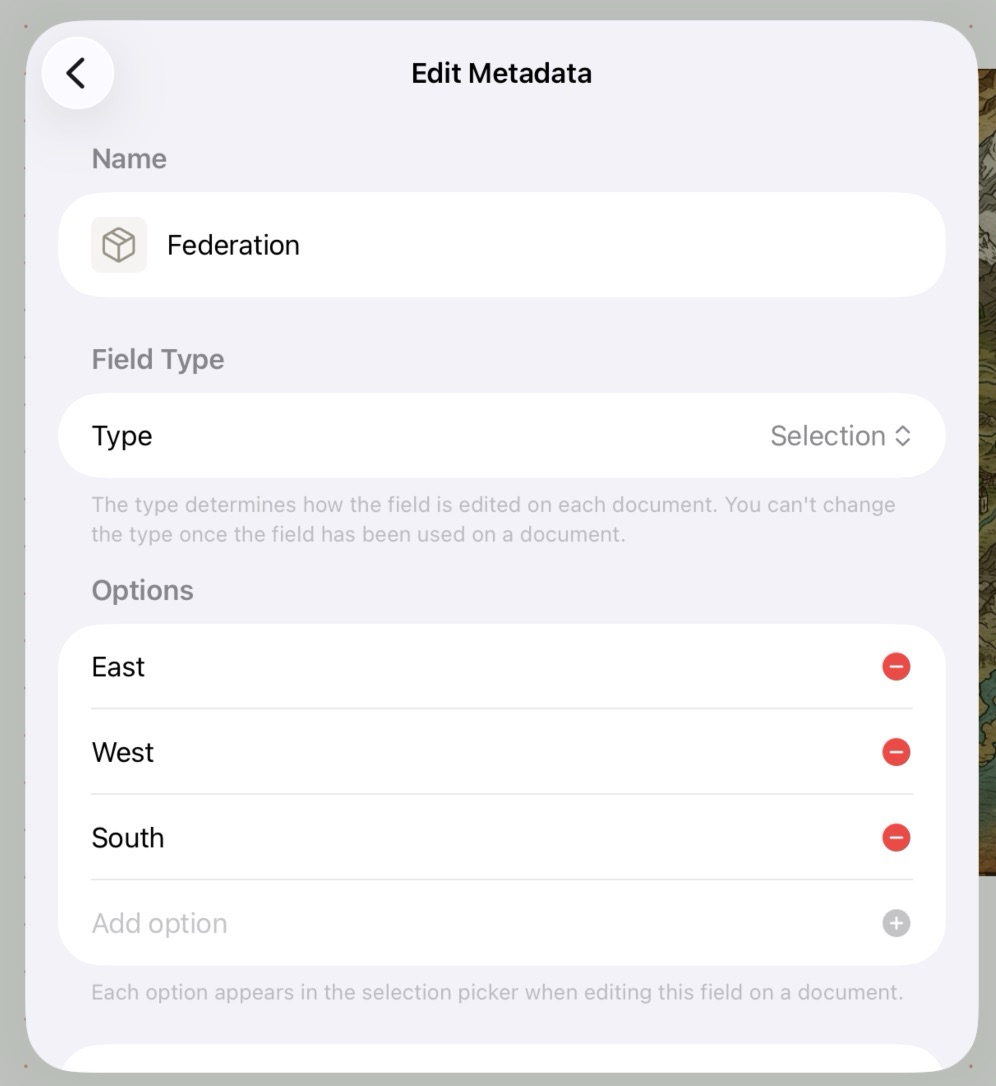
Editing Metadata for a Project
Metadata fields are managed in Project Settings → Metadata. Each field has a name, a type, and an icon.
| Type | What it stores |
|---|---|
| Text | Free-form single-line string |
| List | Multiple free-form values, entered as chips you can edit in place |
| Selection | One value chosen from a predefined list of options |
| Number | A decimal number |
| Boolean | An on/off toggle |
| Date | A calendar date |
| Date & Time | A calendar date with hour and minute |
In the Inspector, click a List value to edit it where it sits. Press Enter or click away to save, or clear the text to remove the item. Type in the Add… field to add another.
Selection options are managed inline in the field form — add options, reorder them by drag, and delete individual entries. Options are project-scoped, so all documents in the project share the same list.
Reorder fields by dragging them; the order here determines the order they appear in the Inspector and in Markdown export. Rename a field at any time from its edit form. Deleting a field is permanent and cascades to all values attached to it across every document in the project — a confirmation dialog appears before the deletion is committed.
Tip
The icon picker lets you choose from the full Atlas icon catalog. The icon appears in the Inspector next to each field row, making it easy to scan at a glance.
Setting Values on Documents
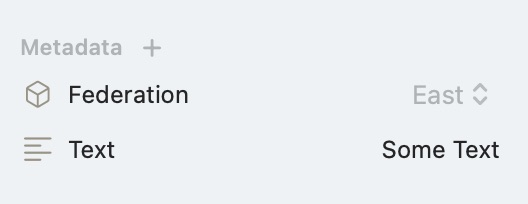
Metadata set in the Inspector on macOS
Open the Inspector while viewing a document and find the Metadata section in the Overview tab, directly below Tags. Use the + button to add a field — the picker shows only definitions that aren't already attached to this document. Each field type has a purpose-built editor for quick entry.
To remove a field from a document, hover over its row on macOS to reveal the × button, or swipe left (or long-press for the context menu) on iOS.
When multiple documents are selected, any field whose values differ across the selection shows a "Mixed values" indicator rather than a single value. Editing the field at that point sets the same value on all selected documents.
Templates and Inheritance
Applying a template copies its tags, metadata values, icon, and color to the new document, alongside its content — using the same Inspector UI you'd use to set them by hand. This is handy for ensuring, say, every new character profile starts with a "Character" tag and a "Status" field without you having to remember.
If a document already has a value for a given metadata field, that field is skipped when a template is applied — so re-applying a template to an existing document won't overwrite values you've already set. Tags and metadata added this way are otherwise independent afterward: editing the document doesn't affect the template, and updating the template doesn't change existing documents created from it.
Markdown Frontmatter
When exporting a document as Markdown, an Include Frontmatter toggle appears in the export settings — it defaults on. When enabled, Atlas prepends the exported file with a YAML block. Tags are listed first as a flow-style array, followed by metadata fields in project-defined order:
---
tags: [Character, Protagonist]
pov: "Alice Liddell"
status: "Draft"
word-target: 5000
needs-review: false
due-date: 2026-07-01
---
Frontmatter is emitted for single-document Markdown exports only. Bulk and continuous folder exports do not include it, and HTML, ePub, and PDF exports never emit frontmatter regardless of the toggle.
The reverse works too. When you import a Markdown file whose frontmatter includes keys beyond tags, title, and the standard date fields, Atlas creates a project metadata field for each unrecognized key and attaches its value to the imported document. Field types are inferred from the values — a Boolean for true/false, a Number for plain numbers, a List for arrays, a Date for ISO-8601 timestamps, and Text otherwise. A document exported with frontmatter therefore returns with its tags and metadata reconstructed. See Markdown Files and Frontmatter for the full key mapping.
Project Export & Import
Tags and metadata both travel with a whole project. When you export an .atlasproject, Atlas records every tag's color and icon, every metadata field definition, and each document's values in the project manifest, and writes the same tag and metadata values as YAML frontmatter into the exported Markdown files (for use in other tools). On import, your tags and metadata are rebuilt from the manifest — definitions first, then each document's values — so a project round-trips with its organization intact. See Atlas Project Files.
See Also
- The Inspector — Where to attach and edit tags and metadata values
- Templates — How tags and metadata values carry over when applying a template
- Searching — Combining tags and metadata tokens in search
- Exporting Your Work — The YAML frontmatter toggle in Markdown export
- Importing Media and Web Pages — How frontmatter is read back in on import